C3: First steps
As I stated in my last post, I began some actual work on this project over the weekend.
What's some times not appreciable, is the amount of time it takes just to get started on something like this. Finding all my Arduino parts and pieces, installing the software, figuring out all the little quirks again (It's been more than 6 months since I finished the robot project).
Finally being setup again for Arduino development, I set to soldering together a little voltage regulator for my bread board. It would allow me to put in anywhere between 3V and 36V and get a nice clean 5V signal out. This way I could independently power my breadboard without extra wires from the Arduino.
Next I needed to test my pressure sensor, to figure out how it works and how best to use it. I started by building a little RC (resistor capacitor) circuit as described in the sensor's user manual. But quickly realized this wasn't necessary with the Arduino, Just using one resistor and an Analog pin I could read it directly. Problem was, I was getting these highly variable values. In fact, when graphed over time, they looked quite a bit like the charge and release cycle of a capacitor.
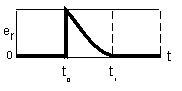
This puzzled me of course because all I had in the circuit was a resistor and the sensor. After more fiddling and frustration, I removed my nifty bread board power supply and hooked it up directly to my Arduino's 5V pin, and instantly I got stable values. Good for my level of frustration. Sad because I really liked my little bread board power supply. Not sure what I screwed up when soldering it together...
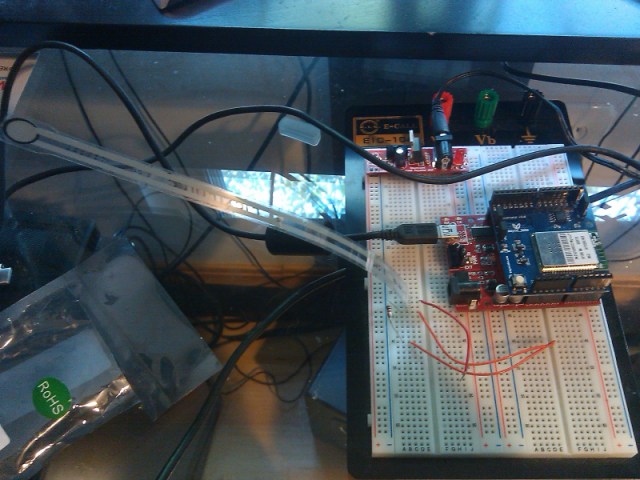
Anyway, I happily played around with my sensor, creating functions to produce readings in lbs rather than voltage and such. It was fun and cleared the way for what was, in my mind, one of the biggest question marks for the whole project.
C3: the Cloud Connected Chronometer begins
Over the weekend, many weeks of research culminated in the first concrete progress on my new hardware project. First let me give a run down of the idea for this project.
The core idea originated from the fact that I'm a bit like Jekyll and Hyde. Except instead of a murderous monster living in my psyche, there is a sleep loving monster who shuts off my alarm clock instead of snoozing it. I know. It's ridiculous. I'm determined to be victorious, however, which brings us to my latest weapon in this battle:
C[cube]
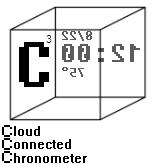
It's an alarm clock that solves the problem using a pressure sensor. The sensor will be between my mattress and box spring, so it will "know" if I'm still in bed, and simply not allow me to turn an alarm off until I get out of bed and stay out. Though I will still be able to snooze alarms as usual.
Now in order to interface with this pressure sensor, I will of course be using my trusty Arduino. And given that, a whole world of possibilities open up! So in addition to the Arduino, I've also pilfered the Wifi board from my robot. So here is the short list of features the C3 will center around:
- Time always accurate using NTP (Network Time Protocol), never set it again after losing power!
- OLED touch screen for simple input, vibrant graphics, no back-lighting for good night time viewing.
- Alarms scheduled using Google Calendar. Never have a work alarm go off on the weekends, vacations, or days off.
- Pressure sensor to ensure alarms are not turned off while still in bed.
- Current weather conditions displayed on screen.
- WAV or MP3 playback for more pleasant alarm types.
I'm also investigating a speech synthesization chip (SpeakJet) to allow it to talk 😛 And obviously there are many more possibilities having an internet connected alarm clock that I will explore once the base features are implemented.
So stay tuned for more updates as I progress on this!
Robo-pernicus: Part 2
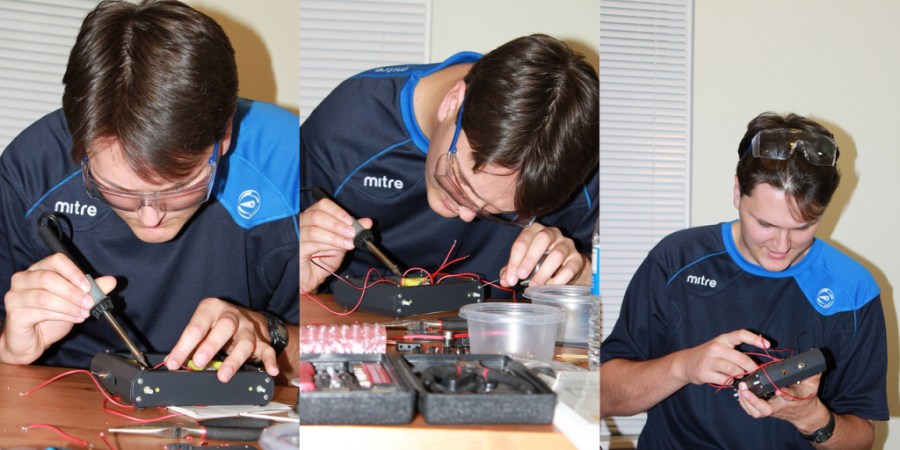
The next day at work it was all I could think about, and around lunch time, it hit me. They are in series! I'm dividing the voltage between the two servos! If I hook them up in parallel they'll EACH get 9V!
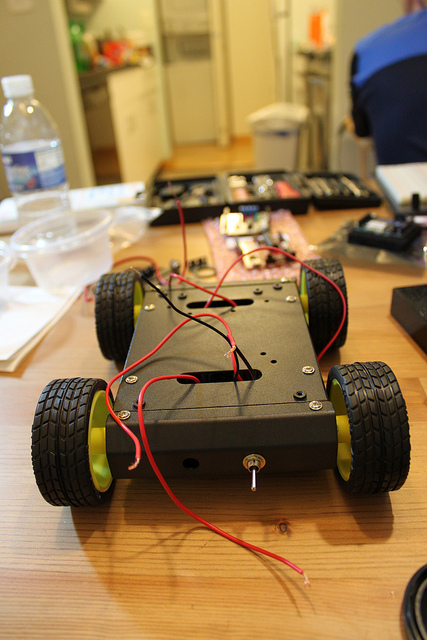
That night after a flurry of cutting, de-soldering, and re-soldering, it was ready. Popping a 9V on it made it leap forward! Excited, I set to work hooking the logic boards together, but when it came time to affix them to the chassis I encountered another problem. It wasn't really meant to host a board like this. The screw holes were probably intended for something else, but certainly not for my Arduino. Additionally, I have a bare circuit board I'm trying to attach to a metal chassis! I looked all around in my spare parts for some sort of fastener or holder or something to mount my logic boards with to prevent them from shorting out on the chassis, but couldn't find anything. Finally I settled on cutting an anti-static bag from an old video card and screwing the boards awkwardly through that bag and onto the chassis however I could make them fit.
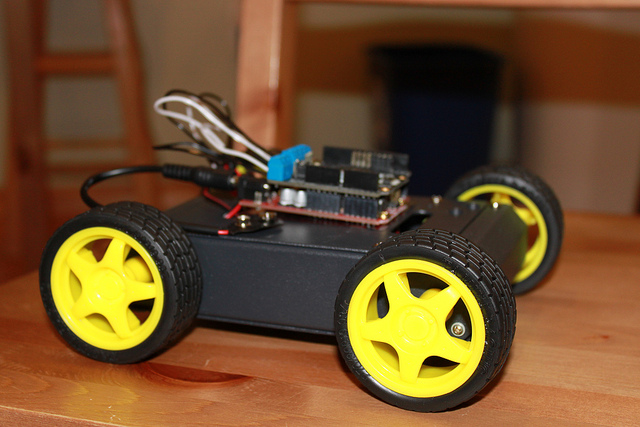
I then set to testing out some stuff with the Arduino. Read up on the docs for the motor driver, wrote some test programs making it move and turn. Then did the same with the wireless chip, tested hosting a webserver on it and allowing you to control the motors by clicking links. It worked! It wasn't very responsive of course, reloading the page after a link click was pretty slow and all. But it worked! So I called one of my friends via Skype who lives in Texas, and using the webcam on my laptop gave him a view of the robot on the floor. Then I setup some port-forwarding so he could access the server hosted on the robot, and it was ready to go! I stepped back, couldn't see the laptop because of how it was positioned for the webcam. And all of a sudden this little robot starts moving on its own, via commands from my friend in TEXAS! (I live in Boston) I mean c'mon! We really take the internet for granted I know, but the series of events that are transpiring to make his actions in Texas manifest themselves in the real world in my apartment in Boston... I mean c'mon!!!
As Tesla once said: "I do not think there is any thrill that can go through the human heart like that felt by the inventor as he sees some creation of the brain unfolding to success... Such emotions make a man forget food, sleep, friends, love, everything."
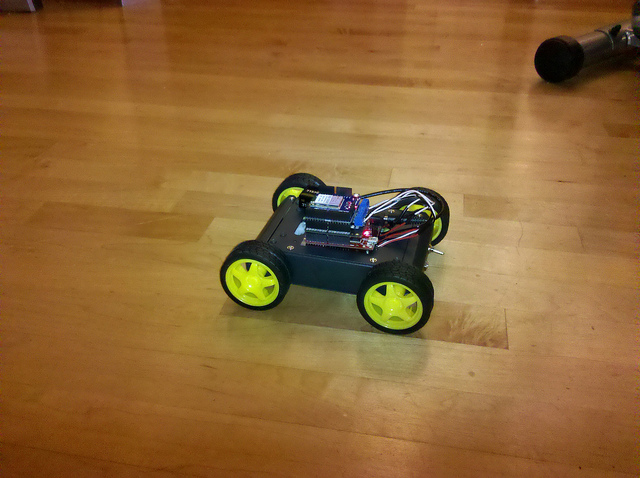
Over the next several days I fast iterated. I ripped out the webserver and wrote a proper socket server for the robot, and socket client that ran on my home server. It was MUCH more responsive. Then I wrote a webpage that used AJAX to send "real-time" control commands to stub PHP script, which in turn sent them onto the socket client. And finally, after much research, I found a webcam that worked with Linux, had auto-focus, and great video quality (glass optics, no plastic crap), and a software package for streaming the video to the control webpage (no X11 or GUI of any kind, which restricted my options quite a bit).
This was a blast, you could log onto the site, see the robot from the webcam mounted in the corner of the room, and drive it around using WASD or GUI controls on the webpage. And I did some input wrapping so key down & key up worked the way you'd expect. It was fun. But it was lacking something big. I wanted to drive this robot in first person perspective.
I began researching wireless webcams, or really wireless cams of any kind, and there weren
Robo-pernicus: Part 1
I probably should have posted about this when I was actually doing it. But C'est la vie.
Anyway I had been messing around with some Arduino stuff a while back, and got pretty far but never finished a project. Other things came up so I shelved it all. Then we got a kitten and I thought it would be fun to be able to play with the kitten while I was out of the house.
So I came up with the idea for a remote control robot with a kitten toy attached to it that you could control from a web page. Already having an Arduino, the natural choice was to extend what I had.
I looked into the different parts I would need and settled on this build:
- Arduino
- SyncLabs WiFi Shield (802.11b)
- 1amp dual motor driver shield
- 4 wheeled chassis kit
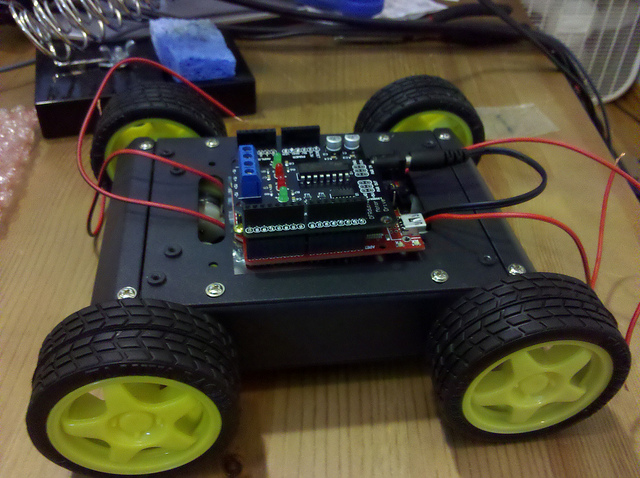
Now being, at least what I consider to be, a fairly adept programmer, I was not worried about the software side of things.
However I was also not worried about the hardware side of things... This was stupid.
Since the control side of the hardware was merely 3 boards that fit neatly together, I started by focusing on the chassis construction. Now I went into this wanting it to be a fun learning project, not just a robot in a kit. And boy did I get more than I bargained for.
The Chassis kit consisted of a 3 zip-lock bags. 1 contained several tiny metal pieces that clearly were meant to be the chassis frame. 1 contained assorted screws and other hardware necessary for assembly, and the last contained 4 small-ish servos.
I've done some electronics stuff, and we had covered circuits in my college physics classes, but any useful knowledge from those past experiences fell out of my head when I was presented with this unorganized, unstructured bag of parts. There was no manual, no instructions, no numbered pieces. Just a bag of constituent components that could, in the right and knowledgeable hands, be assembled into a robot chassis. Though truth be told they could also be assembled into a doomsday machine for all I knew. Each seemed equally possible from where I stood.
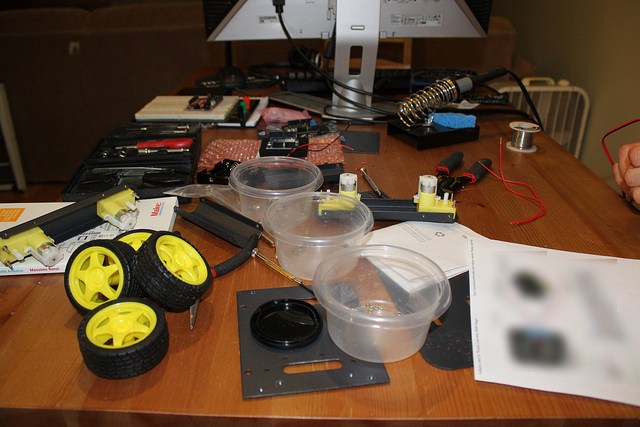
But this is what I had wanted! I wanted to embark on untrodden ground! I wanted to INVENT! Not to follow in the path of countless others! (Of course this isn't really Inventing, it's more so playing with Legos, assembling pre-made pieces into a semi-unique configuration, but give me a break 😛 )
So I dug in. Not knowing where in particular to start I began sizing up the metal parts that would make up the frame. Fitting them together didn't take long to figure out. I ended up assembling them, promptly realizing that the order I did it in presented me with problems, and reassembling it again, several times in fact, until I found the optimal method. Attaching the servos again made me disassemble and reassemble the frame (with the frame fully assembled the space was too small for me to work in to attach the servos).
So Finally, after longer then I'd like to admit, I had the chassis assembled and servo's installed inside it.
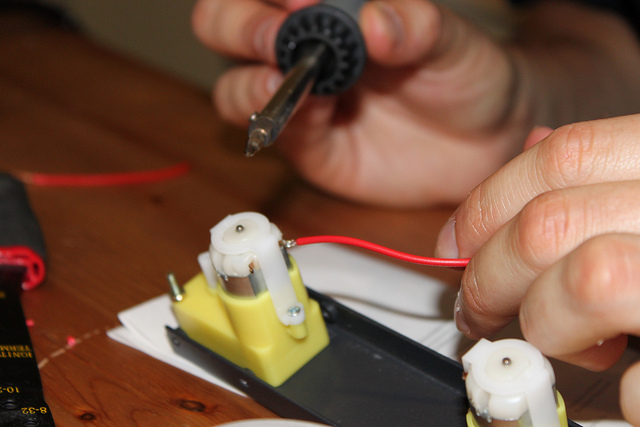
(I'd like to apologize to my past physics professors for this next part. You really did teach me these things! I just forgot for a few hours...)
I played around with my circuit boards a little, and mulled the problem before me. My motor drivers could drive 2 motor independently, but I had 4 servos. It's not a complex problem and the solution may seem obvious, but exactly how to go about it, and the fear derived from being "untethered", made it a contentious decision. After some rough sketches of my wiring harness, I did some Googling and found some one else's rough sketch that looked exactly like mine! That was enough confirmation for me that I was right. No thoughts back to my physics class about circuits, I forged ahead...
The design I had come up with was intended to keep things as simple as possible. Each motor driver had a + and - terminal on the shield, thus I only wanted 4 wires total coming out of the chassis bound for the control board. I would hook up the 2 motors on a given side in series. This kept wire clutter to a minimum, and kept everything as simple as can be.
I could regale you with tales of soldering through the plastic that held the leads, and cutting the wires too short after one end was already soldered, or how I realized the leads on the servo's were thin cheap and breakable, or how I forgot which lead was + and which was - on the servo because one was the revere of the other. But I won't, suffice it to say it's only the 3rd time I've soldered something. And I learned a lot.
At this point I had been at this for HOURS. It was a monster session. I was burnt out. My girlfriend who had been by my side for most of it, was passed out on the couch at this point, stirring only when I would get a face full of solder smoke and make a pained nasal sound.
I was DONE but couldn't go to sleep without seeing it move. Actually hooking up the logic boards was not an option so I just taped a 9V battery to the chassis and connected the leads to it. The results were less then spectacular. While holding it in the air, the wheels barely moved, and when sitting on the ground it couldn't overcome friction it seemed.
Blurry-eyed, frustrated, and tired. I called it quits for the night and passed out.
Prototype: Deformable Terrain
We're in the early planning and prototyping stages for our next project. So I worked up a little prototype of the core tech we will need.
The core mechanic is based around one important assumption: That it's fun to kick over someone's sand castle 😛
To this end we need good free-form terrain destruction! So here is my first effort:
This is about 4 hours of work.
The is tech is inspired by two main games. One should be somewhat obvious. The Worms series.

But the other was a lesser known game that I played YEARS ago called Pocket Tanks (or P. Tanks)
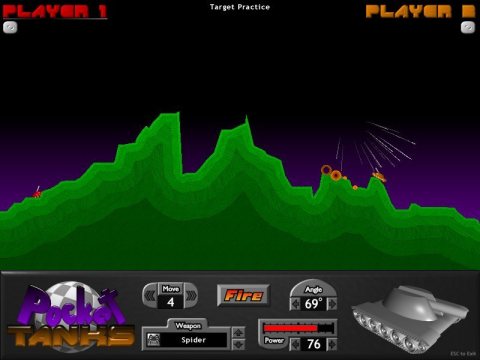
It was an artillery game with a few twists, the most interesting of which (in my opinion anyway) was the terrain destruction!
So after playing quite a few rounds of it, and then a few more rounds (for research I swear!) I went ahead and implemented it in C++ using SFML
Next I'm looking to implement this on Android in libGDX. Some discussions with the libGDX team leads me to believe I'll have to implement the actual pixel pushing using the Android NDK in order to get the unfettered access to the pixel buffer that I need. I've never worked with the NDK so this should be a fun learning experience to get my hands dirty with it!
The Call of the Dark Side
So I've been working on a little Android game for a while now. Mainly as a first effort, small scope, learn the technology sorta deal. So it's pretty simple in concept.
Anyway it's getting to the end of development now, mainly just polishing and tweaking, so I decided to take a crack at making an ad supported version. Generally Ad Mob is meant to integrate with standard Android UI elements, and not just an all encompassing OpenGL ES canvas, so it look a little shoe horning to get it in there, but it's in now.
I had been loading it up and trying it out, clicking the ads and testing how well my app resumed and such. And then I looked at my Ad Mob account... I had made $0.02!!! That's real money! I mean not a lot obviously, but man! I was expecting like $0.00000001 or something! I mean after all it had only been me messing around for a few hours testing my app!
Now up until this point I had been taking care to only show ads in non-intrusive places, like on the menus, or only after you died in the game. But man! For a moment I had a flash of "holy cr@p! I could make real money off of this! Lets put ads EVERYWHERE!!!!"
I started rationalizing to myself how I could display ads during the actual game play, and I could use Ad Mob's feature for interstitial ads ( for those of you that don't know, an interstitial ad is one that takes up the whole screen and is usually placed in the middle of a flow between screens and must be manually skipped to continue on to the next screen, they are terribly terribly annoying ) to get even more ads in there!
I began tweaking some things and then stopped myself. I know how I feel about ad supported software to begin with. And especially software that's just crammed with intrusive ads all over the place. Usually doesn't stay installed on my phone too long.
I want this to be software that I would want to use. I want it to be a quality (if small) game that can still make at least some money. I plan on releasing the ad supported version along with a $1 ad free version. I feel like that's the best compromise. And one that I would be happy with as a consumer & gamer.
But man... wouldn't it be awesome to see that # in Ad Mob go way up 😉
Another one bites the dust…
Welp, funny timing my last post about there being no good Android phones at the moment.
My trusty side kick, the Motorola Droid has decided to die...
Not entirely mind you, but the touch screen is becoming unusable. The bottom left corner in fact. The hardware "back button" is the most affected, working almost not at all, but also anything in the lower right hand part of the screen has become very unreliable.
You wouldn't believe how critical your back button is until you don't have it 🙁
Anyway, my phone is pretty critical to my every day life as well as development (I've been working on an Android game which I will post about soon.) So I had to replace my phone. Since it was rooted, and I had canceled my phone insurance after the last time I had to deal with them (miserable experience), I was a bit out of luck, and had to buy a new phone on my own.
Being about 4 months out from my upgrade period, and not wanting to pay full off-contract price on a last-gen phone, I turned to EBay 😉
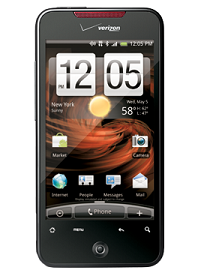
I picked up a Droid Incredible for $199! Not too bad for off contract! And when I do finally upgrade to a sweet new next gen phone, I'll have this for testing purposes 🙂
No good Android phones on Verizon…
I've had my Droid for about a year and a half now (got it the day it came out) and all though it has treated me well, it's getting quite old in "phone years".
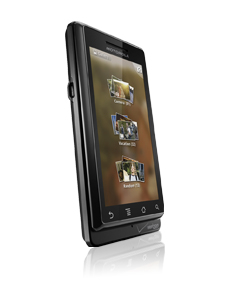
I'm not due for an upgrade until July, so it's not a pressing issue at the moment, but while musing on what I might get when it's time, I have come to the conclusion that there really isn't any Verizon Android phones in the near future that look compelling.
Probably the most interesting phone currently is the Motorola Atrix 4G, but of course that's AT&T.
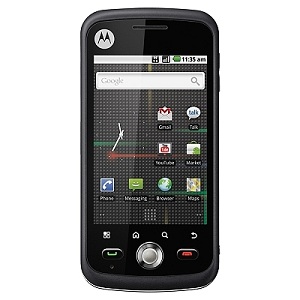
HTC's up coming phones are decidedly last-gen, lacking the hardware sensors that 2.3 brings to the table, and shipping with 2.2.
The Sony PlayStation phone (Xperia Play) is fairly interesting to me for it's performance and how up to date it is with 2.3's hardware features, I feel like it will be kept up to date as new versions of Android roll out, but that's admittedly based on nothing.
And then there is the news that Netflix simply won't ship apps to phones with out hardware DRM support. Meaning ALL current phones will never get Netflix streaming. And more than likely all the phones currently in the pipe line will similarly never get Netflix. This is actually kinda a big deal to me, I'm a Netflix addict!

On the same vein, the Motorola Xoom, while very sexy from a lot of stand points, will NEVER get Netflix! And at least for me, it's primary use case would BE streaming movies!
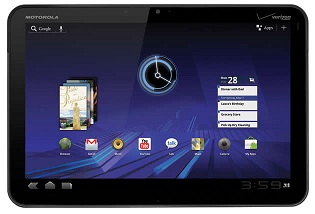
Now Qualcomm has recently announced a new rev of the Snapdraggon line that included hardware DRM, and Netflix has given it it's blessing, so thats great news, but they are only now shipping samples to manufacturers, which means we most likely won't see handsets with it till NEXT YEAR! Suck!
And none of the other SOC manufacturers have even announced a similar solution yet. NVidia already release their road map through early next year, none of which included hardware DRM, and that's just the SOC release schedule, not end user devices including them. TI to my knowledge has not released a road map showing so far out, but we can assume they have at least the rest of this year planned out. All this means is we probably won't see wide spread Netflix support till the end of 2012! SUCK!
As a small side note, I'd been down on Qualcomm for their less then stellar GPU they saddled their Snapdragon SOCs with, but the new rev of their GPU is a whole different ball game, it's goes head to head with the Tegra 2 and holds it's own, so I'm very interested in the next generation of phones based on this SOC.
But I digress...
The last thing that weighs in on my decisions is both UI customization (I don't want any!), and time-to-update when new versions of the OS come out. Google's own handsets get updated very quickly, but they never come to Verizon. Both HTC and to a lesser degree Motorola manage to update their handsets, but pretty much every other manufacture has a MISERABLE track record.
So where does all this leave me...
I guess what I really want is a Nexus X, Google made, Verizon loving, stock UI, always updated hand set, with Motorola's industrial build quality, and hardware DRM for my precious Netflix... Let me know if anyone sees one laying around 😛
Stack Overflow

Me on Flickr
Archives
- May 2012
- March 2012
- February 2012
- January 2012
- December 2011
- November 2011
- October 2011
- September 2011
- August 2011
- June 2011
- May 2011
- April 2011
- March 2011
- February 2011
- July 2010
- March 2010
- February 2010
- September 2009
- May 2009
- May 2008
- November 2007
- October 2007
- September 2007
- July 2007
- May 2007
- April 2007
- March 2007
- February 2007
- January 2007
- December 2006
- November 2006
- October 2006
- September 2006